Cctv Dvr Password Hack
How do I hack a CCTV by android phone. Mainly CCTV cameras & router organized default username & password. Crack the CCTV camera. Can we hack DVR CCTV?

That's essentially where I am. I actually want a simple camera with options for standard format streams over IP so I can connect them to a NAS on its own LAN, hidden in a closet for a cheap security setup using hardware I already own. But so many of these things are pitched as 'oh so easy to set up! Just plug it in and open an app on your iPhone and you can monitor your house from anywhere!' It's bad enough that this app-centric branding/marketing pitch ignores the fact that you never even see the popup saying 'for security purposes, change your password', much less mentions just how this easy access works. Sure, it's easier to just plug something in and get a picture with no more action needed than pointing at a square on a screen. But even the ones that can be made moderately secure (at least versus casual Shodan searchers and Google dorks) by setting a password and turning off DDNS, telnet, ftp, etc.
Are often left in their wide-open setup state by users. On the flip side, I don't want something that only works with a 'cloud' subscription or by going through a third party that I may or may not have to pay for monthly. I just want to be able to pull an mp4 or mjpeg stream from an old computer running iSpy or my Synology on the local-only LAN. Tl;dr: these things are affordable and very useful if you know how to set them up but by default they're wide open and often irresponsibly marketed as plug-and-play and never actually configured. Wow, that repo is a class act. Binaries checked in and everything. Clearly looks like this and the OP's DVR share lineage.

From what I can tell, the e-mail address etc. Are defaults used in CGI_send_email, which is only invoked as the handler for the /email endpoint. Looking at the order of endpoints defined in it seems that /email was probably left out in the DVR's code, so it's possible this function is simply never invoked, and we're just left with the WTF that not only did the original author (Mr. Law) think that an e-mail service needed a default 'To', but that he thought it should be him, and that he left it in the final product.
Sorry for the late reply. I never used any of the 'pro' options so I guess it never came up for me. It's like Plex in that regard, at least how I personally use it. I just use iSpy as a free, flexible program I can run on an old computer, attach it to the same LAN as the IP cameras, and set it up for motion detection, recording, and storage/archive. I definitely agree that if you want some or all of the 'premium' features, a one time purchase is the only option. I don't like recurring subscriptions and avoid them when possible. I guess in this case, since you're paying for functionality on their servers it makes sense to pay as you use it.
Still, as an end user, I do avoid subscriptions if I can. Good to know you've got a better option though. Abhishekam Serial Actress Mounika there.
Anything that allows you to self-host this stuff (mostly at least) is a positive thing IMO. In my early experiments before moving to the Synology software on my NAS, I had the computer running iSpy save to the Dropbox folder on that computer and limited the archive size to match the capacity of that Dropbox account. That way I could at least access recordings from elsewhere but I never got into email or SMS alerts. Not sure how I'd personally set that up. Neo: Who are you? The Architect: I am the Frank Law, the architect. I created the Matrix.
I've been waiting for you. --- Someone please go arrest this voyeur before he deletes the evidence. If he was some low level engineer i would perceive this as unintentional. Download Aeg Santo No Frost Manual Transfer. That's not the case. Unless the title 'chief software engineer' means something else in China. From my sleuthing experience, deleting things [the github repository] usually means some kind of wrongdoing; not necessarily related to the erased.
It is my belief this was intentional.
Security systems are jumping aboard the technology train. Therefore, configuring these systems are starting to get more difficult.
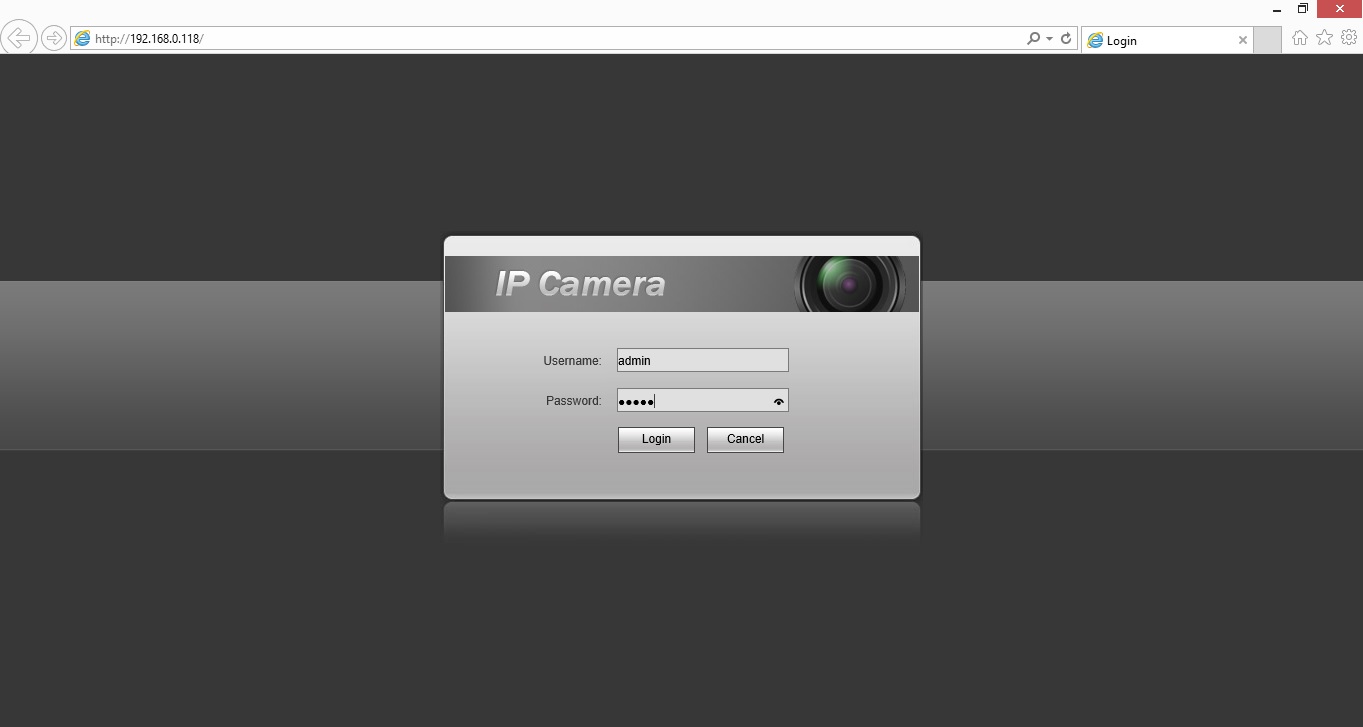
Keeping your IP camera system safe from accidental or malicious misconfiguration might seem like a large headache. There are a few layers of protection you can take to make sure no one can access something they aren’t supposed to. The last thing you want after installing your system is to have it ravaged by someone on the back-end rendering it useless. Secure Your IP Camera First and foremost change all of your cameras' passwords. This will prevent users from logging in directly to the camera. If you haven't enabled ActiveX and added the camera to a trusted site, follow this guide: When you've finished above follow the steps below: 1. Log in to each camera via its IP address using IE11 (Internet Explorer 11) 2.
Navigate to SYSTEM ->ACCOUNT 3. Delete all the users except for admin 4. Change the password for admin to a unique password that is no more than 6 characters long. Do not forget this password, as resetting the camera may require sending it back to our RMA department for a reset. Secure Your NVR Recorder or DVR The next step to take is to set User Groups to assign different roles to different Users you may want to have. This way you can limit certain Users to specific functions.
These Users will then be connected to the DVR or NVR with their username and password when using SmartPSS. Each User will only be able to access the content allowed by the settings configured in the NVR/DVR for that User and its Group. Using IE11 navigate to the IP address of your NVR/DVR and log in as the administrator. The default is admin/admin. Select the “Setup” tab at the top of the screen. Now select “System” >“Account” from the left side 4. Select “Modify” on the admin account then check the “Modify Password” box.
Change your admin password to a six character string. Completing this will help prevent unauthorized people from accessing your NVR/DVR.
Creating User Roles on the NVR/DVR Now create a new user by selecting add user at the bottom. These users will be generic rights templates for the users that will have access to monitor, playback, record etc on the recorder. Create a name 2. Select Reusable (very important) 3. Create a password no more than 6 alphanumeric characters long 4.
Select user from the group dropdown box 5. Adjust System Manager, Playback, and Monitor privileges as needed 6. You can create more than one user if you have roles that need to be filled separately. (ie: Someone who monitors live feeds vs.
Someone who views old footage) Configuring SmartPSS for One or More Users After you have your User and Groups created on the NVR/DVR, you will be able to set up SmartPSS easily. You can also create accounts in SmartPSS to limit user access on the local machine to only certain functions on SmartPSS so they are not able to scan your network for IP cameras and NVRs using SmartPSS's built-in network search feature. In a given scenario if one machine views live footage and another machine reviews stored footage, you would create an account on the viewing machine and apply the role when setting up the software. The same will go for the second machine, only with the separate role you created. Add Your NVR/DVR to SmartPSS Before you create user groups on SmartPSS add your NVR/DVR using the admin account. Go to on the bottom left of the home screen. Select the NVR/DVR you’d like to view and click “add” below it.
Double-click the device you just added in the lower panel. Change the username and password to the proper User/Password that you created on the NVR.
Create User Specific Roles on SmartPSS 1. Click on at the bottom of the screen. Create “roles” for your new user groups by selecting the role tab at the top left.
Add a role by naming it, adding any remarks, select channel Rights, and menu rights. • Repeat step 3 for as many roles as you need. Create your users by selecting USER >[add], Name the user, give the user a password, select a role from the drop-down box, customize the specific users role by removing permissions as needed from the rights. In our example, after logging in with “test user” given the rights granted, the only available option to access is Liveview. After completing these tasks you will have added up to three layers of security to your system, and you are ready to start monitoring.